Editing a Regional Nesting Suite#
Once you have copied the regional nesting suite, the next step is to navigate to your copy and open it using the Rose graphical user interface (GUI).
Step 2: Open the suite in the Rose GUI#
Launch the Rose editor by running:
Running graphical applications over SSH
If you are connected to a remote system over SSH, graphical applications need X11 forwarding to display on your computer. Start an X server on your computer first (for example, XQuartz on macOS), then connect from a terminal using generic host details supplied by your service:
ssh -AY <remote-host>
Repeat the options for every additional SSH hop. The -Y option enables
trusted X11 forwarding. The -A option forwards your SSH authentication
agent and should only be used with systems you trust. A terminal integrated
into an editor such as VS Code works in the same way as any other terminal.
On the system where you will start the graphical application, run
echo "$DISPLAY". It should return a value. If it is blank, disconnect
and reconnect with X11 forwarding enabled at every hop before continuing.
rose edit &
See also
For help choosing the correct Monsoon3 service and finding the official setup guidance, see Using Monsoon3.
rose edit &
Note
You must be on the Cylc host to run rose edit. It is not
available on the compute nodes. X11 forwarding must be enabled on
every hop, including the lander and the Cylc host.
Note
“Other” means your own machine, or a system run by another institution. You provide the environment yourself. See Choosing your platform.
rose edit &
What does the rose edit & command do?
This command opens the suite in the Rose graphical user interface, allowing you to view and modify its configuration.
The
&at the end runs the GUI in the background, so your terminal remains available for other commands.
Step 3: Setting Up the Regional Nesting Suite#
Once the GUI is open, you can begin configuring the suite for your specific experiment or run by navigating through the tabs on the left side of the window.
General Run Options#
Navigate to the General run options tab to define the key settings required
to run your nesting suite.
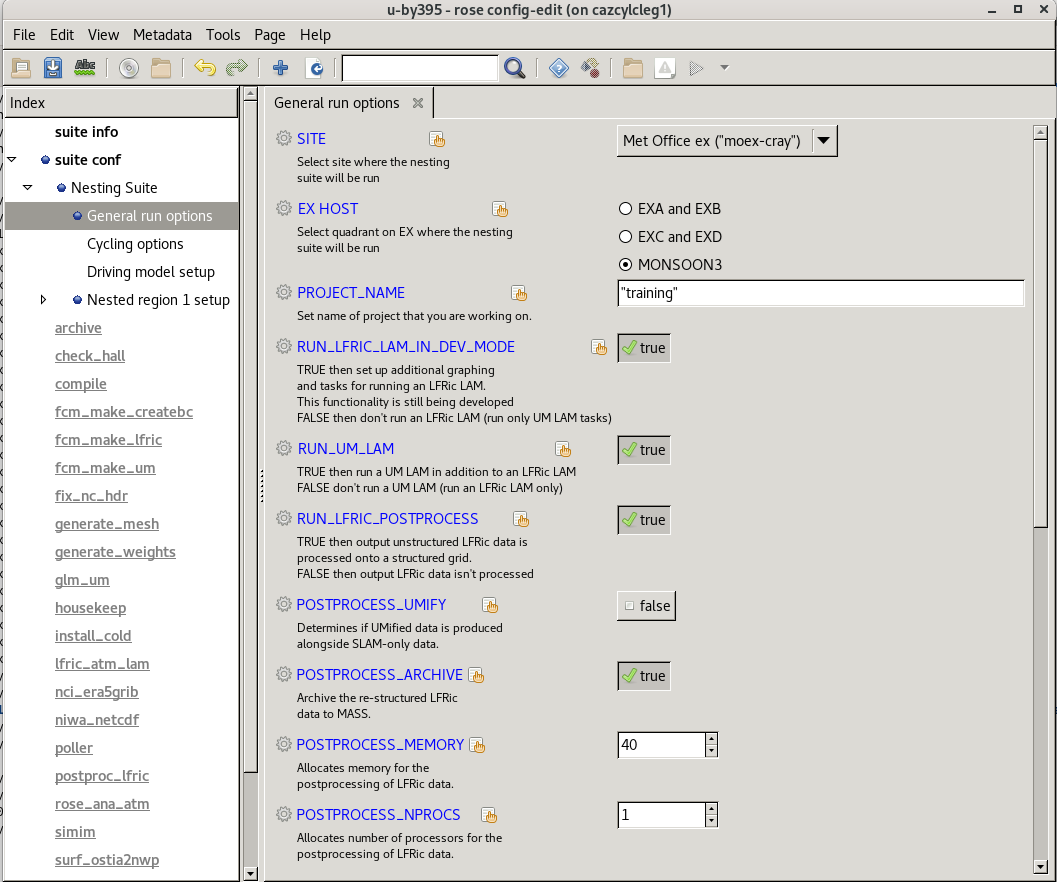
Fig. 28 Screenshot of the ‘General run options’ panel in the Rose configuration editor.#
Site and Machine Selection#
SITE Select the machine where the nesting suite will run (e.g. Met Office EX “moex-cray”).
EX HOST Choose the execution host group (e.g. MONSOON3, EXA/EXB, or EXC/EXD depending on availability).
Project Configuration#
PROJECT_NAME Specify the project code used for accounting or charging the run (e.g.
training).
Model Run Options#
RUN_LFRIC_LAM_IN_DEV_MODE Enables additional graphing and debugging tasks for the LFRic LAM. -
true: Run LFRic with development diagnostics -false: Skip LFRic development featuresRUN_UM_LAM Determines whether the UM LAM is run alongside the LFRic LAM. -
true: Run both UM and LFRic (useful for comparison) -false: Run only LFRic LAM
Post-processing Options#
LFRic data is produced on an unstructured grid. If required, it can be post-processed onto a structured grid for analysis.
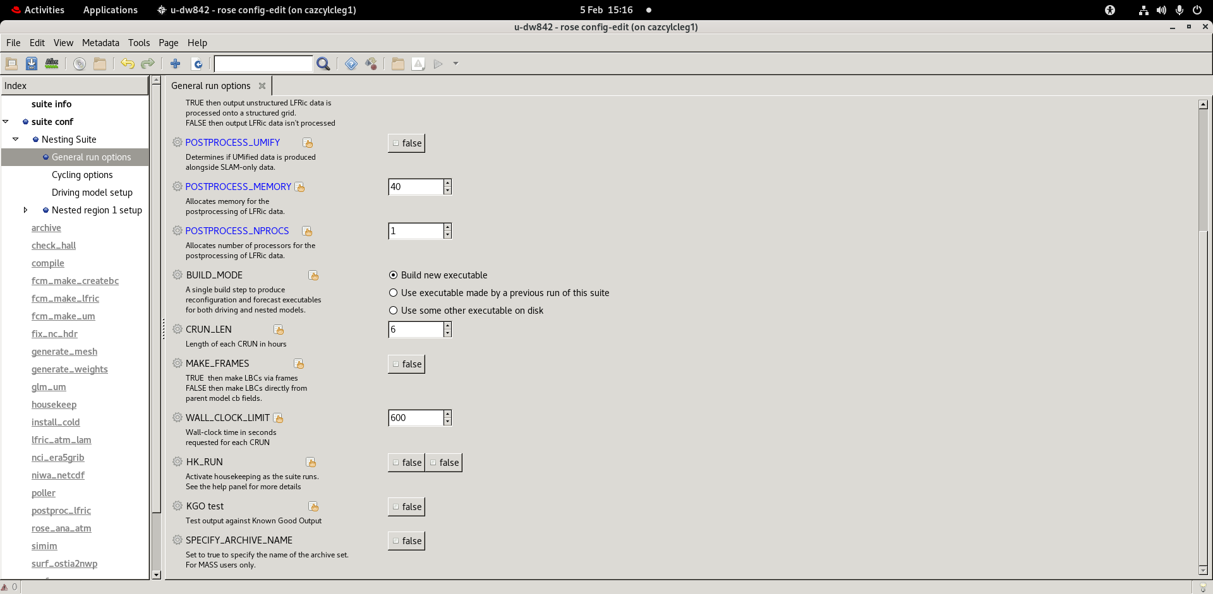
Fig. 29 Post-processing configuration options in the general run options.#
RUN_LFRIC_POSTPROCESS Enables post-processing of LFRic output. -
true: Convert output to a structured grid -false: Keep native unstructured output
💡 Tips
Hover over the hand icon in the GUI or click the settings icon next to each option to view additional help.
Start with default values for training exercises before experimenting with custom configurations.
Running both UM and LFRic LAMs is recommended for validation and comparison during learning.
Cycling Options#
In this section, you will configure the cycling options for your model
experiment using the rose GUI. These settings control how the model progresses
from one cycle to the next and define the start and end times for your run.
The interface shown below highlights the key options available.
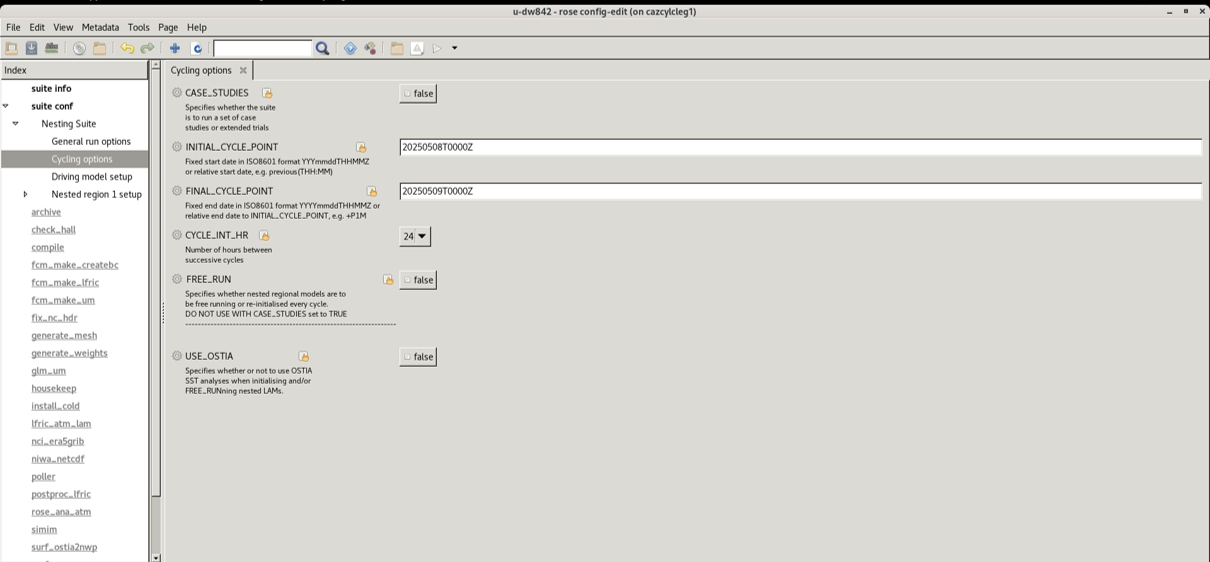
Fig. 30 Cycling options panel in the rose configuration GUI.#
For this self-learning exercise, you can use the following configuration:
Set CASE_STUDIES to
falseDefine a short experiment window using:
INITIAL_CYCLE_POINT=20250508T0000ZFINAL_CYCLE_POINT=20250509T0000Z
Keep CYCLE_INT_HR =
24Leave FREE_RUN =
falseLeave USE_OSTIA =
false
This setup provides a simple, manageable configuration for training purposes.
Driving Model Set-up#
To run the Limited Area Model, you will have to use a driving model to obtain the initial data from. This can be set up in the driving model window. You can start the regional model from several options such as UM global model, ECMWF forecast fields, archived analysis files, etc. These options can be chosen from the driving model window. You can also choose the resolution of the driving model, number of processors needed, etc, from this sections.
Nested Region 1 Set-UP#
This section allows you to define the nested domain for your limited area model (LAM). You will specify both the region name and the number of resolutions (experiments) you want to run (eg., if you are planning to run the limited area model at two different resolutions such as 4.4 and 1.5kms, then choose resolution as ‘2’ here)
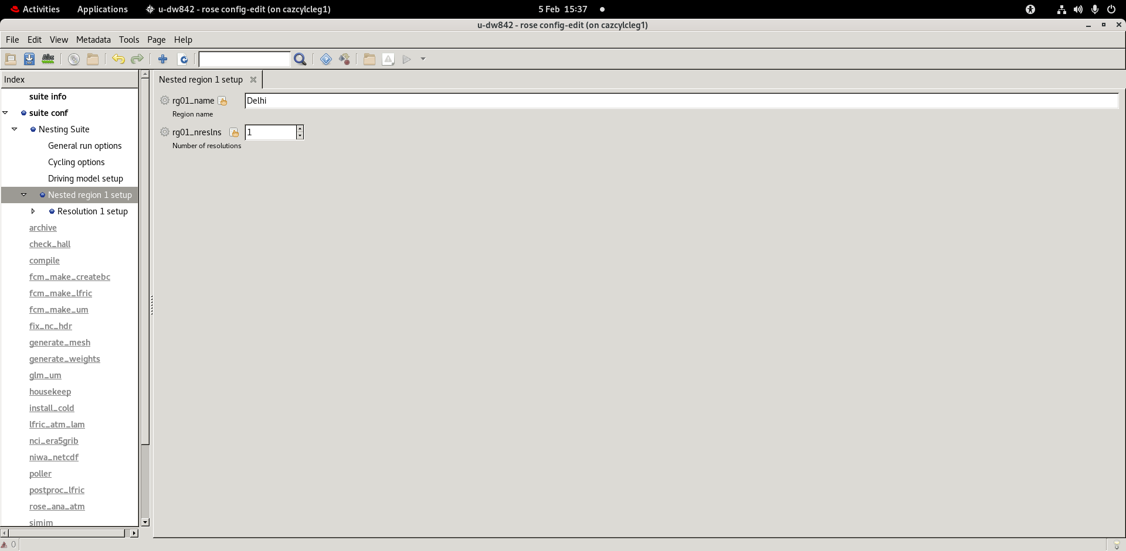
Fig. 31 Nested region 1 setup interface in the GUI#
Once this is set, move to Resolution 1 setup to configure each experiment.
Resolution 1 Set-Up#
This section defines the horizontal and vertical resolution and links the required ancillary data.
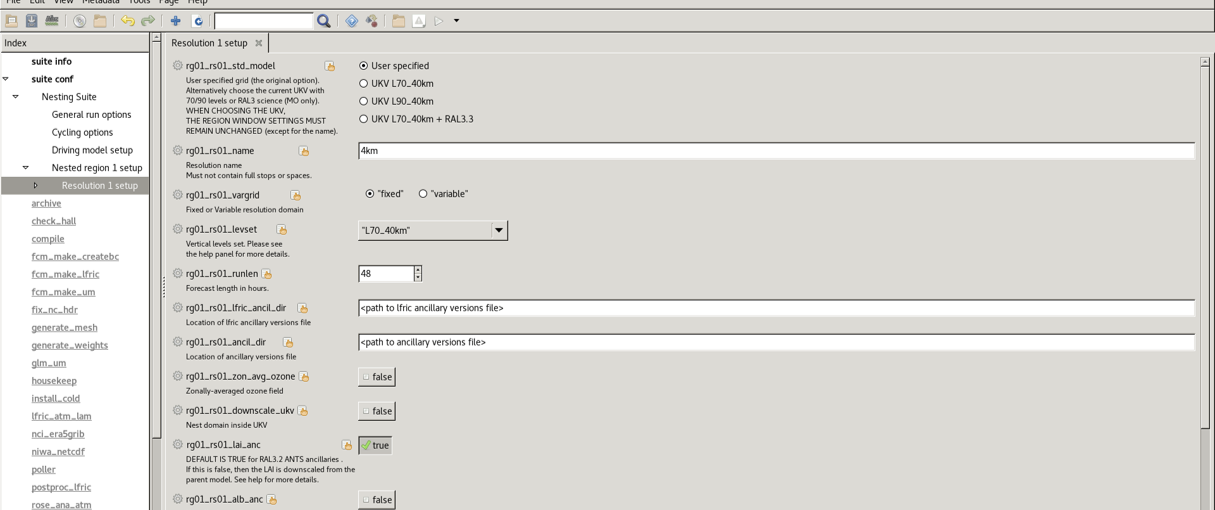
Fig. 32 Resolution 1 setup interface in the GUI#
Note
Ancillary data
The ancillaries can be generated using the regional ancillary suite. If the ancillaries for your specific domain and resolution are already available, you can copy those ancillaries to the machine of your choice.
Please get in touch with Momentum_Partnerships@metoffice.gov.uk
for all enquiries regarding the ancillaries.
Config 1 Set-Up (Science Configuration)#
This section allows you to configure the science options and model behaviour for your limited area model experiment.
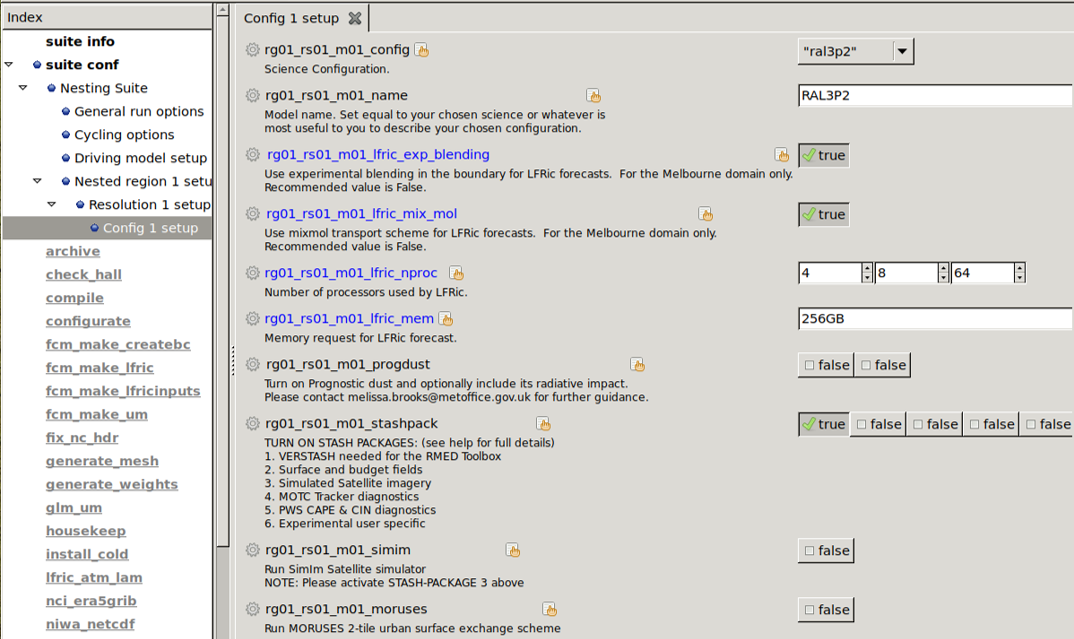
Fig. 33 Config 1 setup interface in the GUI#
In this panel, you will define the key scientific settings for your model run.
Tip
💡 Naming Your Region, Resolution & Configuration
When choosing a name for your nested region, resolution, and configuration, you are free to enter anything you like as long as it does not contain spaces or periods.
The idea is to choose names that are meaningful to you so that when you look back at your suite output directory in the future, you can remember what you did!
Example:
Region:
UKResolution:
4p4_L70Configuration:
RAL3P2
This corresponds to a 4.4 km resolution model over the UK with 70 vertical levels using the RAL3.2 science configuration.
Once the limited area model is all set up, you can go ahead and run the model.
Note
You can also edit the suite by editing the corresponding .conf file in the suite directory, if you do not wish to use the Rose graphical user interface.