

Merge, Test & Commit#
The process for committing a PR follows this sequence with details for each of these steps outlined below.

Important
- Before You Start:
Is anyone else committing?
- Repository Status is used to coordinate
maincommits for all projects.
This operates on a first-come-first-served queuing system.
To join the queue use the
Add Itembutton.Do not move yourself up the queue unless agreed with others.
- Repository Status is used to coordinate
Simple, not conflicting commits can be done in parallel if reviewers all agree.
Changes with KGO or Macros usually require sole access to
main.
Check how many commits have happened today. Suggested limit per day, per repository is 4.
More than 4 can be committed if
allgroups have been run by a team member.
Important
Linked PRs?
If this is a set of linked PRs then the commit process will need to be followed for each repository in parallel. See Committing Linked Pull Requests for more details of how this works.
Important
All changes made by the reviewer (e.g. for upgrade macros, KGOs or linked
PRs) will be committed to the developers branch in their fork. All
testing should be run on this branch too. Once this is all complete then
GitHub can complete the merge of this branch to main.
1. Clone Branch#
Note
If this is a linked PR, then do these steps for all pull requests
Ensure that the source branch is up to date with main. Only resolve conflicts that appear simple and you are comfortable with. If there are more complicated conflicts ask the developer to solve them themselves. If there are conflicts in versions.py then see the details in the macro section below.
Then clone the up to date branch. There are many ways to do this, eg.
gh repo clone <developer>/<fork_name> <clone_name> -- -b <branch_name>

# OR

cd /path/to/upstream/clone
gh pr checkout <pr_number>
2. Macros (if required)#
If the PR includes metadata changes, upgrade macro changes or a new rose-stem app then you will need to upgrade the test-suite.
Update the versions.py file#
versions.py contains a sequence of upgrade macros. Each macro contains a
BEFORE_TAG and an AFTER_TAG which should create a single chain, starting
at the last release and finishing with the PR you are committing. The tags
have the format version_ticket, i.e. vnXX.Y_tZZZZ. The ticket value can be
either the Issue number of the PR number.
When resolving conflicts in this file make sure that the new macro being added
by your PR is added to the end of the file. Modify the BEFORE_TAG to
match the AFTER_TAG of the previous macro in the chain.
If this is the first macro since the release then the BEFORE_TAG will be the
version number with no added ticket number.
Remove the template macro if it is still present.
Apply the upgrade macros#
To update the test suite for an upgrade macro, please run:
./admin/rose-stem/update_all.py \
    --path=/path/to/um/clone \
    --um=vnXX.Y_tZZZZ \
    [--jules-path=/path/to/jules/clone]
where --um=vnXX.Y_tZZZZ is the AFTER_TAG of the latest
upgrade macro.
If there is a macro for fcm_make or createbc then check that the
makes version*_*.py has the correct BEFORE and AFTER tags and
append --makeum=vnXX.Y_tZZZZ and/or
--createbc=vnXX.Y_tZZZZ to the above command.
Note
The --jules-path option is only required if there are
linked changes to the rose-meta/jules-shared directory in the
Jules repository.
./bin/upgrade_jules_test_apps vnX.Y_tZZZZ
where vnX.Y_tZZZZ is the AFTER_TAG of the latest upgrade
macro. The upgrade is expected to fail for the fab_jules,
metadata_checker and umdp3_checker apps.
apply_macros.py vnX.Y_tZZZZ [--apps=/path/to/apps] \
    [--core=/path/to/core] [--jules=/path/to/jules]
where vnX.Y_tZZZZ is the AFTER_TAG of the latest upgrade
macro and the others are paths to the relevant sources. Apps
defaults to the current location. Core and Jules default to
reading the dependencies.yaml file in the Apps source. A copy of
apply_macros.py is available at
$UMDIR/SimSys_Scripts/lfric_macros.
Tip
module load scitools will give all required dependencies
for Met Office users.
Note
All LFRic Core PRs with macros are expected to be linked with an LFRic Apps change.
New rose-stem app?
If the PR introduces a new rose-stem app, but doesn’t otherwise have a
macro then that app will need to be updated to match the metadata at the
head of main.
In the new app directory get a list of all available upgrade points by running
rose app-upgrade -a -y -M path/to/working_copy/rose-meta
Select the latest upgrade point from the list provided and then run the command again, adding this to the end
rose app-upgrade -a -y -M path/to/working_copy/rose-meta vnX.Y_tZZZZ
The app should now be updated to the same metadata version as the rest of
the apps on the main. This can be checked with:
rose macro --validate -M path/to/working_copy/rose-meta
Note
LFRic Apps PRs will require an LFRic Core source to use. You can do
this by checking out an appropriate clone, and exporting the
environment variable ROSE_META_PATH=/path/to/core.
For UM PRs, if there are linked changes to the
rose-meta/jules-shared directory in the Jules repository, then a
suitable Jules source will need to be included in the ROSE_META_PATH
as described above.
Temporary Logical?
If a new temporary logical has been added, or an old one retired, then update the table that lists them.
Important
Now commit the changes made by the macros script back to the developers branch.
Do not push the changes at this stage.
3. Test (if no KGO)#
The amount of testing to be done at this stage depends on the complexity of the
PR, and what has already been done. A minimum level is required for even
trivial PRs to check that the merge has not caused issues, or that there
are no clashes with what else has gone onto main.
Note
Linked PRs will need to be tested together as discussed on the Committing Linked PRs page.
Run any necessary testing; at the very least run a compile group, generally run developer, and more complex PRs warrant running everything:
# Update the group as appropriate, eg. developer or all
cylc vip -z group=debug_compile -n <name/of/suite> ./rose-stem
If there is a change to the build configs then you may need to turn off
prebuilds. To do so update rose-stem/site/meto/variables.cylc such
that
{% do SITE_VARS.update({"PREBUILDS" : false}) %}
The JULES test suite is quick to run, so it’s usual to test all for
any PR. If you have the appropriate environment setup then include
the fab group too.
cylc vip -z group=all -n <name/of/suite> ./rose-stem
The UKCA rose-stem contains minimal tests at the moment, but should be run to confirm the style checker passes.
cylc vip -z group=all -n <name/of/suite> ./rose-stem
UKCA testing should also be carried out using the UM rose stem. See Linked PRs page for advice on how to set this up.
LFRic Apps rose-stem contains tests spanning all the applications included in the repository. At the very least run the developer group which gives a basic level of tests spanning everything. The full set of tests may be warranted for any application that has had more complex changes.
# Increase testing as appropriate, eg. lfric_atm or all
cylc vip -z group=developer -n <name/of/suite> ./rose-stem
Run the test suite command from the top level of the repository to run a complete set of the rose-stem developer suites.
cylc vip -z group=developer -n <name/of/suite> ./rose-stem
Check the documentation builds correctly:
module load latex
./build_umdoc.py [XXX YYY etc]
where XXX YYY are the details of which docs require building.
JULES documentation is hosted within the JULES GitHub repository. To review and build the documentation branch locally, move to your local clone of the JULES GitHub, then:
git pull
git switch <branch name>  # optional
cd doc

# Create and activate virtual environment
python3.12 -m venv .venv
.venv/bin/pip install .
source .venv/bin/activate

# Generate html documentation in ./build/html
make clean html

# At the Met Office you can also run the following to
# deploy the documents directly into ~/public_html/jules/<branch>/
make clean deploy
To generate PDF documentation, ensure you have a LaTeX distribution
installed and run the following command. The pdf will be generated as
./build/latex/JULES_User_Guide.pdf:
make latexpdf
4. KGO & Supporting Data (if required)#
If your change is known to alter answers, you need to update rose-stem KGO
for all affected tests before you commit to the main.
Supporting data is stored in the filesystems of our machines and changes to use will require the reviewer to update those files (BIG DATA).
NB: These instructions are Met Office specific, other sites may manage their KGO differently
Setup for first KGO install (UM + LFRic Inputs)
If doing a UM or LFRic Inputs KGO, before you start the process below there is a one-time setup step required to allow you to generate KGO using the update script.
Edit ~/.metomi/rose.conf on all platforms - VDI, EXAB, EXCD, EXZ
[rose-ana]
kgo-database=.true.
KGO files are stored in $UMDIR/standard_jobs/kgo or
$UMDIR/standard_jobs/lfricinputs/kgo and are installed there using
a script.
Run the rose stem tasks that require a KGO update, plus any other testing required (see above) - if unsure run the all group.
cylc vip -z group=all -n <name/of/suite> ./rose-stem
You will need access to both:
The PR branch, up to date with
mainand cloned locally. You likely already have this.A clone of the SimSys_Scripts github repo (one is available in $UMDIR). Run the script
kgo_updates/meto_update_kgo.shwhich is located in SimSys_Scripts.
The script will ask you to enter some details regarding the PR.
Platforms: enter each platform which has a KGO change, lower case and space separated, e.g. azspice ex1a
If running on the EX’s it will ask for the host you ran on - this can be found from Cylc Review.
Path to your local clone - the script will check this exists and will fail if it can’t be found.
KGO directory: this will default to vnXX.X_tYYYY where XX.X is the version number and YYYY is the PR number.
There are further prompts to the user through the script - in particular to check the shell script produced.
If running on EX’s the script will ask whether to rsync UM files or lfricinputs files to the other EX hosts. Select the appropriate option.
Check that the new KGO has been installed correctly by restarting your suite, retriggering the failed rose-ana tasks and checking they now pass. The suite can be reloaded by running
cylc vr <name-of-suite> -S USE_EX<AB|CD>, selecting the host zone where the suite originally ran.
More details on KGO update script
This script will login as the relevant admin user as needed
After running for a platform, the newly created variables.cylc and shell script will be moved to Azspice
$UMDIR/kgo_update_files/<new_kgo_directory>.Having run on each requested platform the new variables.cylc files will be copied into your clone
rose-stem/site/meto/variables_<PLATFORM>.cylc.
Updating KGO manually (rarely needed!)
Create a new directory for the new KGO. The naming convention is vnXX.X_tNNNN, where NNNN is the PR number. The location of the KGO for the nightly is
$UMDIR/standard_jobs.Copy the new KGO from your rose-stem run into the directory vnXX.X_tNNNN created above. Note that you need to provide a complete set of files, not just ones which have changed answers. This includes the reconfiguration .astart file!
If a file hasn’t changed you can optionally symlink forwards from the previous version (i.e. move the old file to the new KGO directory and replace it with a sym-link to the updated version) But do not do this if the old version was a major release (vnX.X), this is to allow intermediate KGO installs to be deleted later.
Remember to RSync and update the bit comparison table(see above).
Run the standalone rose-stem with housekeeping switched off to generate new KGO.
cylc vip -z group=all -n <name/of/suite> ./rose-stem
Update KGO_VERSION in rose-stem/include/variables.cylc.
Copy the new KGO to the correct locations:
Check that the new KGO has been installed correctly by restarting your suite, retriggering the failed rose-ana tasks and checking they now pass. The suite can be reloaded by running
cylc vr <name-of-suite> -S USE_EX<AB|CD>, selecting the host zone where the suite originally ran.
KGO Checksums are stored in the repository alongside the code and can be updated using a script. This can be done by either the Code Reviewer or by the developer (before submitting their changes for review). In the latter case, the update will need redoing by the reviewer before commit if there are merge conflicts in the checksum files.
Fix any merge conflicts in the checksums - it shouldn’t matter which merge option is selected as you will be overwriting these checksum files again in the following steps.
Run the rose stem tasks that require a KGO update, plus any other testing required (see above) - if unsure run the
allgroup.
cylc vip -z group=all -n <name/of/suite> ./rose-stem
Ensure the failing KGO’s match those on the branch.
Run the checksum update script stored in
<local_clone>/rose-stem/bin.
python3 ./rose-stem/bin/update_branch_kgos.py \
    -s <suite name/runX> -w <path to clone>
Note
The numbered run directory must be included in the suite name, e.g.
name-of-suite/run1.
Verify the checksums updated properly by retriggering the failed checksums. First retrigger
export-source, and then when completeexport-source_ex1aif new checksums are present there (there is no need to retrigger azspice). You may need to change the maximum window extent of the gui in order to see the succeeded tasks. Now you can retrigger the failed checksums - these should now pass if the KGO was updated in the clone correctly.
Important
Now commit the changes made by the KGO script back to the developers branch.
Do not push the changes at this stage.
Tip
Between running any required testing and installing the KGO check that the
failing rose-ana tasks match those in the developers trac.log. If any
have failed for other reasons (e.g. timeout) then these should be
re-triggered before attempting to install the KGO files.
4.1 Managing BIG DATA#
Static input data, such as initialisations and ancillaries, are required by many tests.
LFRic apps tests use a BIG_DATA_DIR environment variable to provide a platform based path prefix to provide direct access to data required for tests.
The master copy of this is held on Azure Spice at
/data/users/lfricadmin/data/.
cron sync
A cron job is run daily at 04:30 utc on Azure Spice as the
lfricadmin user, which runs the script:
from
/home/users/lfricadmin/bigDataManagement/rsyncBigData.sh
This script synchronises the content of
/data/users/lfricadmin/data/ from Azure Spice to EXAB and
EXCD, deleting all content not in Azure Spice BIG_DATA from
the remote locations and updating any changed content.
This BIG_DATA_DIR is not versioned nor source controlled on any platform. Care is required. The ability to log in as the lfricadmin user is required, e.g. via
sudo -u lfricadmin -i
As reviewer, you should work with the developer, prior to moving to the commit stage, to:
Place new files in the appropriate location on Azure Spice under
/data/users/lfricadmin/data/Run relevant tests on Azure Spice.
Wait for the daily
cronjob to run to synchronise data between Azure Spice andEXAB+EXCD.Ensure that you are in charge of
mainfor the repositories involved.Update your clone if other commits have happened.
Rerun relevant tests
If the requirement is to update existing files, then further care is required.
Ensure that you are in charge of the in charge of
mainfor the repositories involved.Retain a temporary copy of the existing files, using a .old suffix.
Place updated files in the appropriate location on Azure Spice under
/data/users/lfricadmin/data/Run all tests on Azure Spice only
revert changes immediately if there are any issues, and consult with the developer.
Manually trigger the synchronisation script to synchronise data between platforms
Waiting for the daily
cronjob to run can introduce a misalignment or race condition for scheduled testing.
Rerun relevant tests on EX machines
revert changes immediately if there are any issues, and consult with the developer.
Remove any
.oldfiles that you created on Azure Spice.
5. Commit#
Once testing has passed on the local Met Office machines then ensure all changes for macros and KGOs have been committed to the local copy of the branch and then push the changes back to the remote branch.
Tip
If you get a permission denied error when trying to push, ensure the pull request allows edits by maintainers, and ask the developer to change it if not.
Important
Linked PRs will also need to update the relevant hashes for sub-repos before pushing back to the fork. See Committing Linked PRs for details.
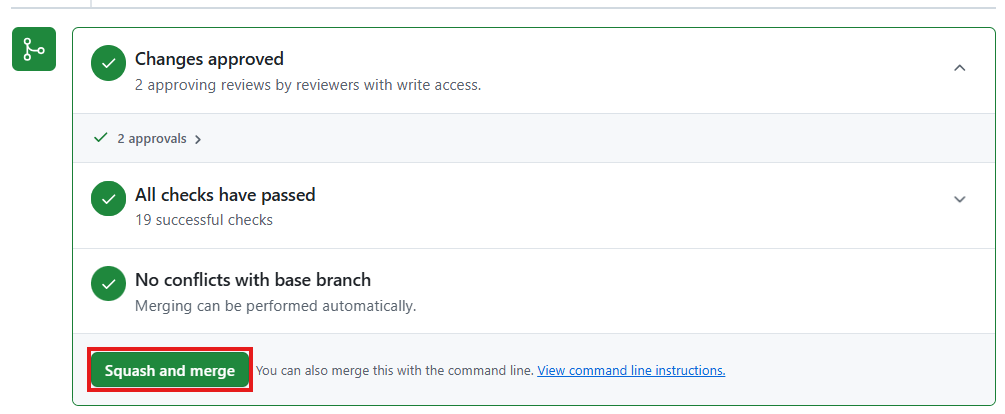
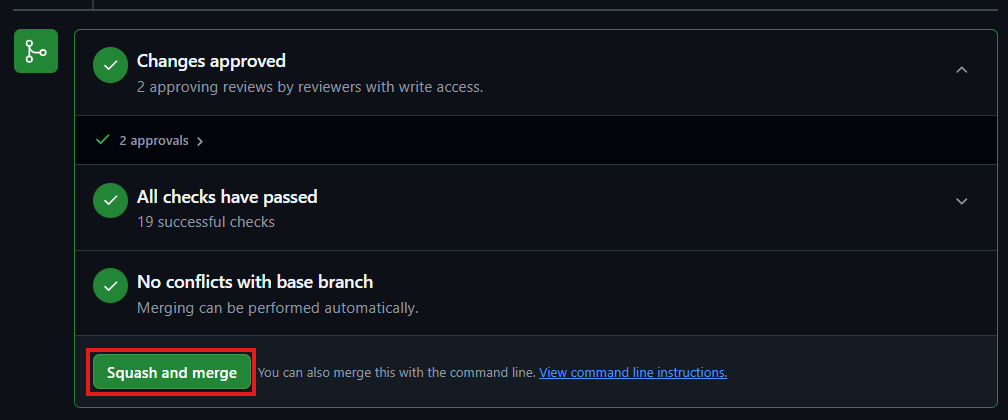
Once the remote branch has been updated, the pull request continuous integration will relaunch. Make sure this all passes and then you can commit the PR via the GitHub interface,
Tip
Don’t forget to let the team know you’ve finished with main.
6. Close#
Nightly testing results are usually checked with a status posted on Repository Status. If this hasn’t been done then check the nightly results.
If something is broken:
Announce to the team and on the Repository Status.
There are a few possibilities for how to proceed,
If the fix is obvious and trivial then create a quick PR on a branch from
mainand find someone to review it. If the developer is available and able to fix it then they can make the pr and you can review.If there isn’t an easy fix then reverse the change to allow time for investigation.
Reversing Commits to Main
Tip
Reverting a commit from main will require the help of a friendly repository admin.
The Admin:
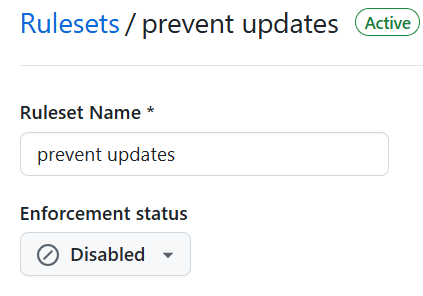
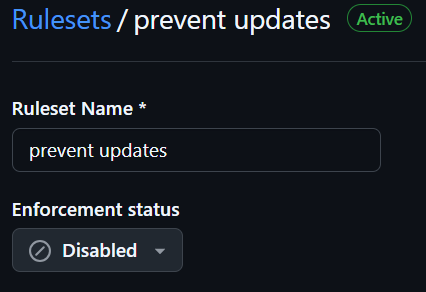
Navigate to the repository rulesets under settings,
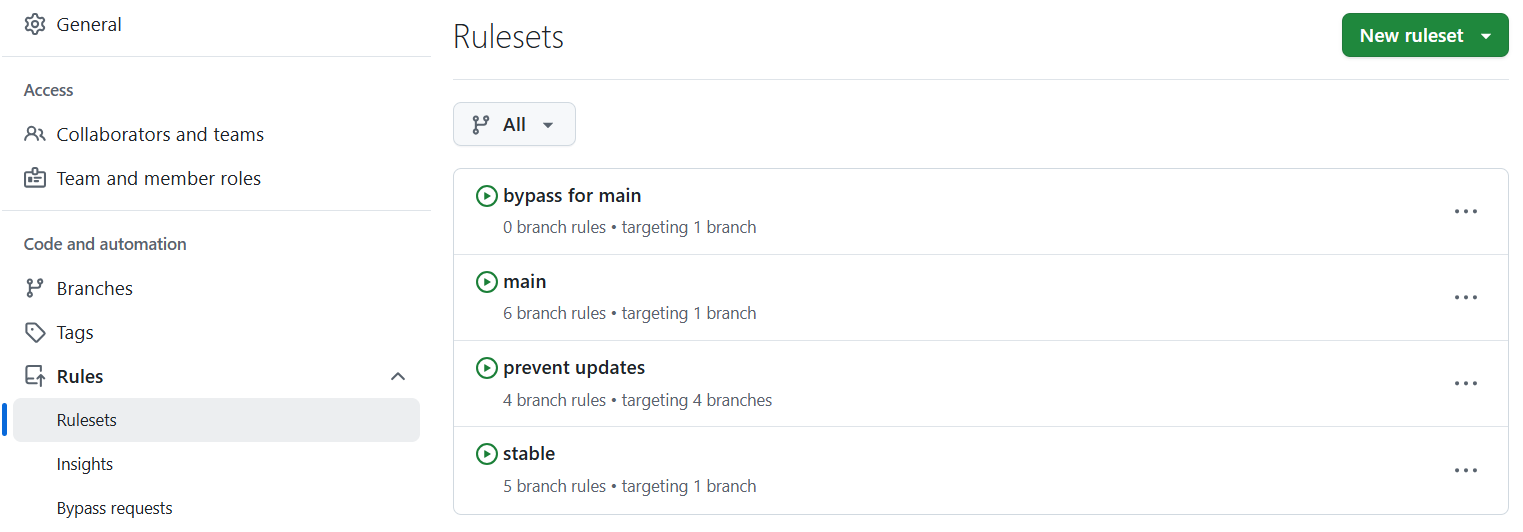
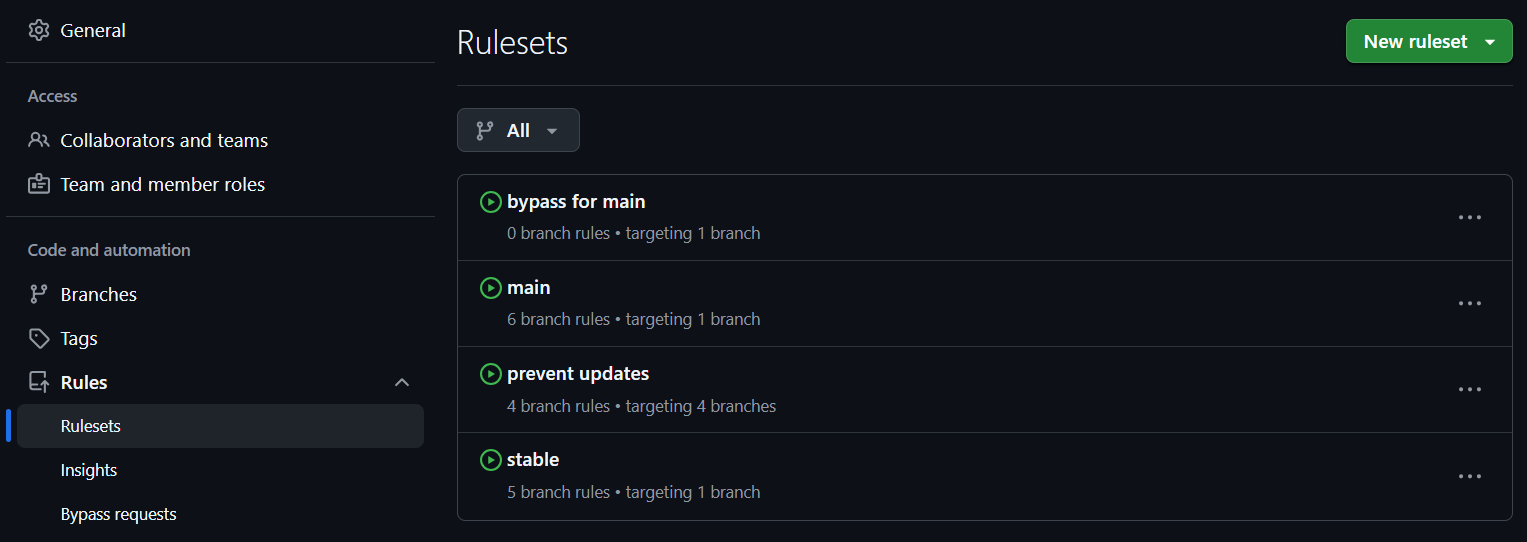
and then temporarily disable the prevent_updates ruleset. This will
allow a branch to be created in the repository to revert the change.
The Original Reviewer:
From the closed pull request, select the option to revert the merge,


If there are any conflicts with later commits then fix these. A new branch with the revert will be created and a pull request will be opened. Checkout this branch and run local testing. Then request a review from the admin.
The Admin:
Review the change and ensure testing has been completed, then commit the pull request.
Finally, reenable the branch protection rule you disabled earlier.
Tip
Logging in as an admin user
To access the admin account you’ll need to be added to the admin-access list by an admin-owner. This is managed through Active Directory
When logged in to your linux desktop run
xsudo -iu <ADMIN-USERNAME>.You can then access other machines as the admin user via
ssh -Y
<HOSTNAME>
.